Set Up a Multi-Day Event That Occurs on Non-Consecutive Days
If
you have a multi-day event that occurs on non-consecutive days (e.g., a
class or workshop that takes place every Monday night for 3 Mondays in a
row) the best option is to add a separate event for each day of the
class/workshop. After adding the first event, you can easily copy it to
the other dates on the calendar
To add the first event:
- Go to MembershipWorks > Event List and click the Add New Event button at the top.
- Next to Event category, click to select the applicable category from the dropdown
- Enter an event title
- Next to Start, enter the date of the first event/class/workshop. You can also enter a start Time, although this is optional.
- Next
to End, enter the date of the first event/class/workshop (the same day
entered as the start date) and enter the end Time (optional).
- Complete the other fields under the Event Setup tab as needed (e.g., Place/location, Event address, description, etc).
- Click Save & Continue
at the bottom. This will move you to the Ticketing tab, which you
should not complete yet. Instead, follow the instructions below to first
copy the event to the other non-consecutive days when the
classes/workshops occur.
To copy the event:
- Go to MembershipWorks > Event Calendar
- Click and drag the event title to the next date the event will occur
- Repeat this process until you have a separate event on each day the event/class/workshop occurs.
Here is how this will look on the calendar:
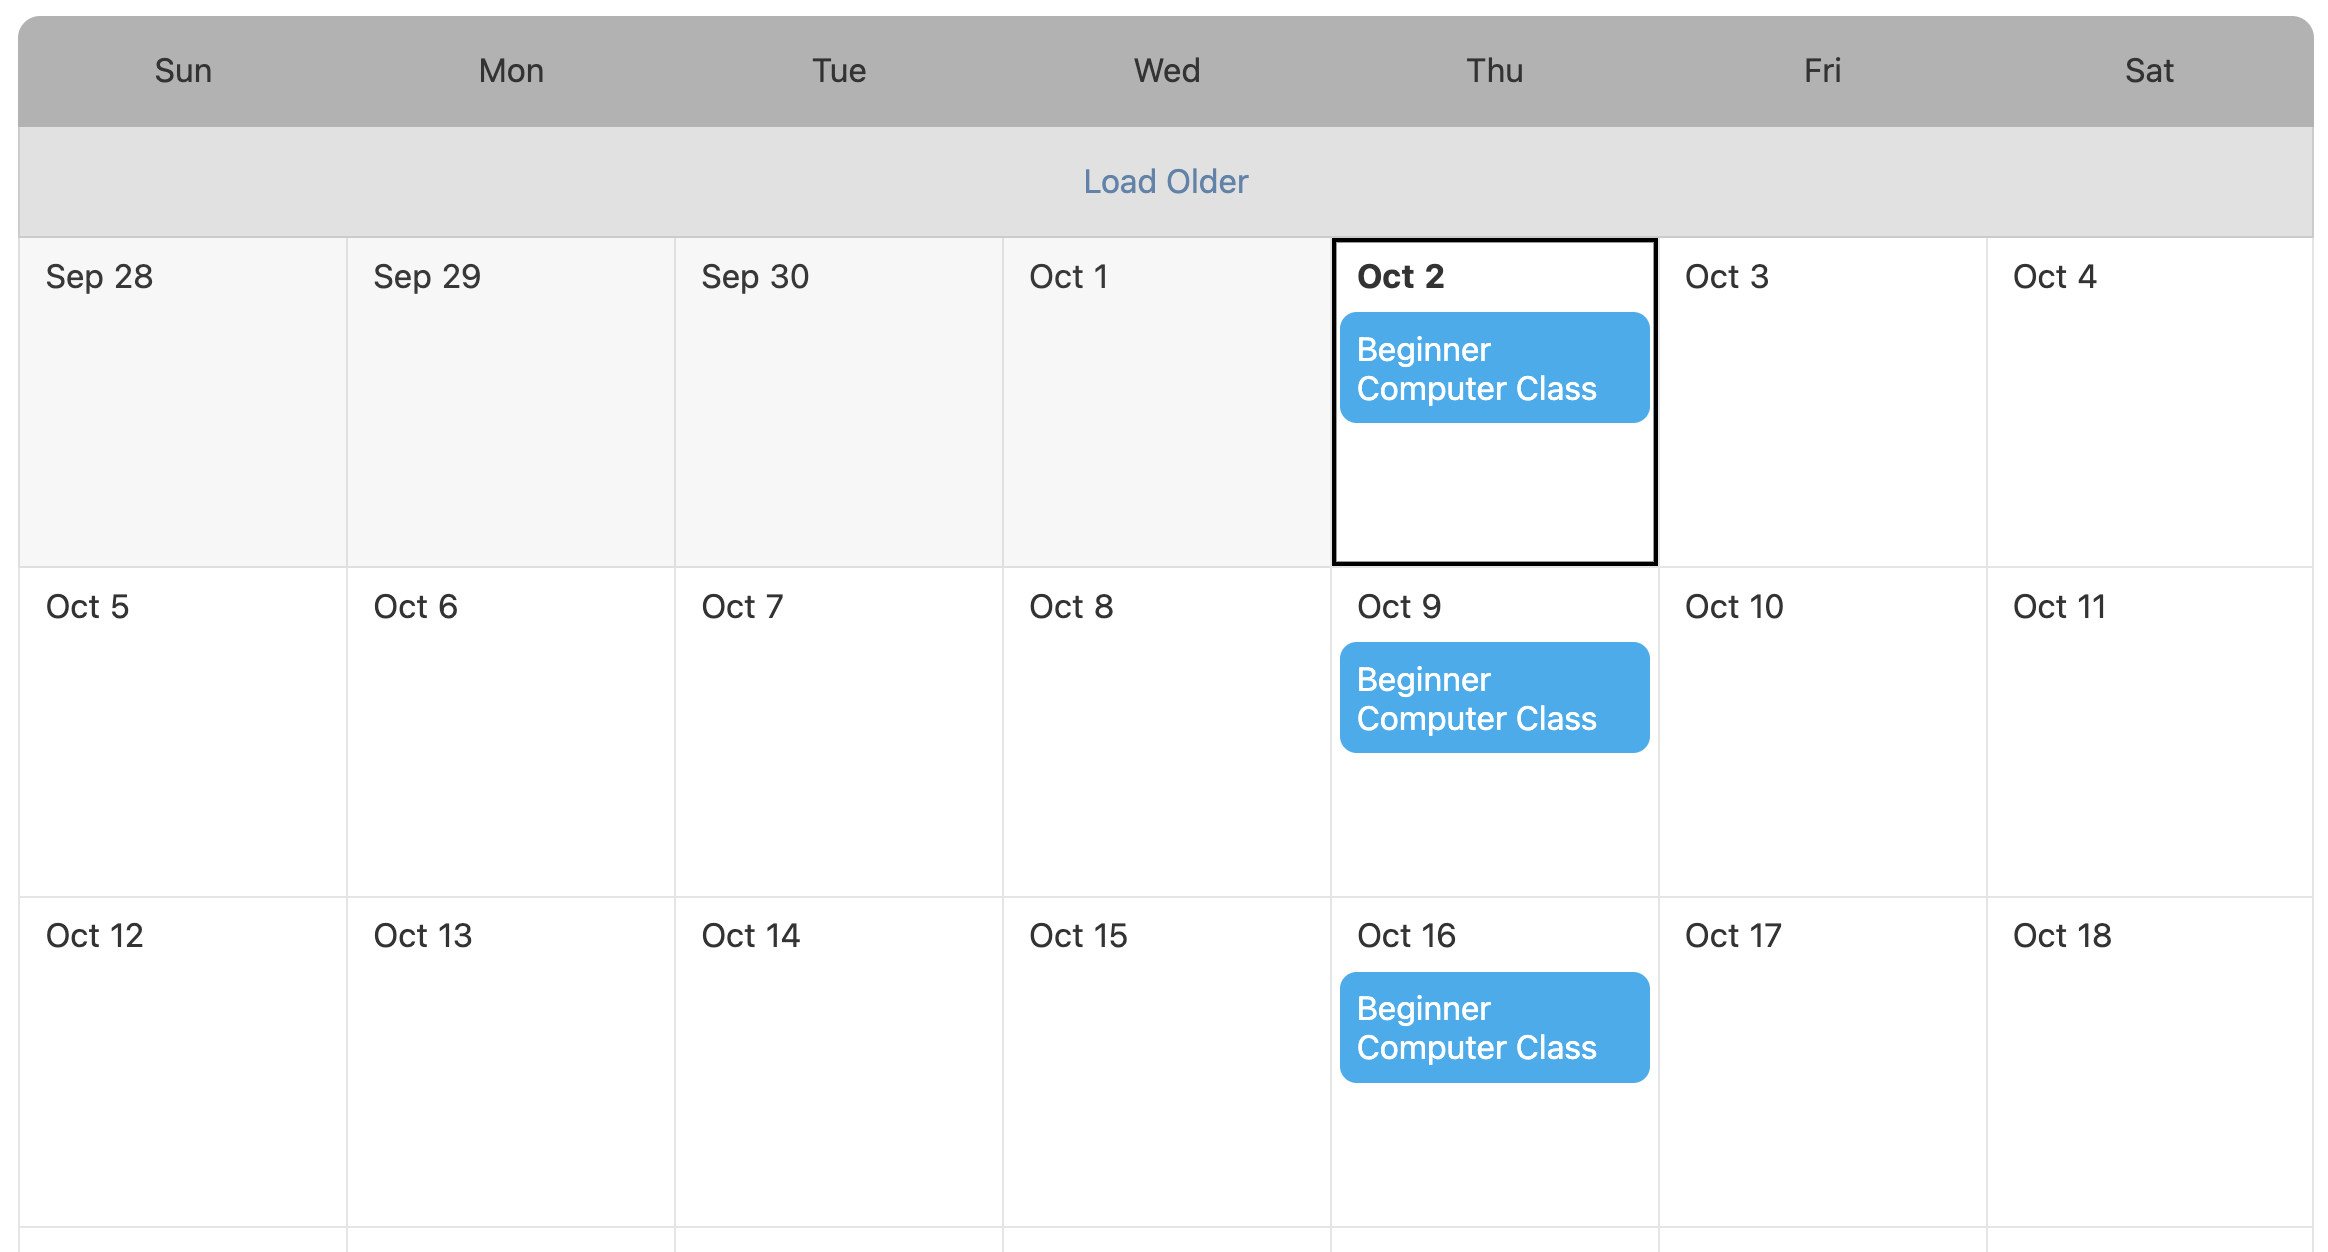
If
the event shown above (3 non-consecutive days) had been added as one
event with a start date of Oct 2nd and an end date of Oct 16th instead
of three separate events, the event would have spanned through all of
the days between Oct 2nd and Oct 16th.
If you do not need users to
register or RSVP for the event, you do not need to complete any more
steps. However, if you want users to be able to register or RSVP for the
series of events, continue with the instructions below.
Enable registrations for a multi-day event that occurs on non-consecutive days
Although
each day of the multi-day event is technically a separate event on the
calendar, most organizations find the best option is to keep all of the
registrations in the same location which makes it easier to view, manage
or export your attendee list.
To set this up, you should add tickets to the last day’s event in the series. Before adding tickets, you should consider which of these two options work best for your registration. You can find the instructions for each option below.
- Registration option 1 – Selling the event as a whole
Registrants pay one price for the entire series and will be able to attend each day of the event. - Registration option 2 – Selling separate event tickets for each day of the event
Registrants only pay for the days of the event they will be attending
Registration option 1 – Selling the event as a whole
Below is an example of what this ticket selection will look like on the registration page.

- Go to MembershipWorks > Event Calendar and click on the last event in the series
- Click the Ticketing tab at the top
- Click + Add Event Ticket
- Enter a Ticket name. (e.g., Member Ticket, Guest Ticket, etc)
- Next to Ticket price enter the price to register for the entire event series
- Complete the other fields under the Ticket
tab as necessary. If you are not limiting this ticket to one per
registrant/account, you should follow these steps to collect each
attendee’s information:
- Click the Questions / Sessions / Add-Ons tab
- Click + Add Question / Session / Add-on Per Ticket
- Next to Type, select Name or Full name from the dropdown
- Click OK
- Repeat steps 6b to 6d for each field as needed
- Click Save
Registration option 2 – Selling event tickets per day of the event
Below is an example of what this ticket selection will look like on the registration page.

- Go to MembershipWorks > Event Calendar and click on the last event in the series
- Click the Ticketing tab at the top
- Click + Add Event Ticket
- Enter a Ticket name that is indicative of the day of the event. (e.g., Monday, Oct 2)
- Next to Ticket price enter the price to register for that particular day’s event
- Complete the other fields under the Ticket
tab as necessary. If you are not limiting this ticket to one per
registrant/account, you should follow these steps to collect each
attendee’s information:
- Click the Questions / Sessions / Add-Ons tab
- Click + Add Question / Session / Add-on Per Ticket
- Next to Type, select Name or Full name from the dropdown
- Click OK
- Repeat steps 6b to 6d for each field as needed
- Click Save
- Repeat steps 3-7 for each event day
Edit the confirmation email
One
thing to note is that the confirmation email automatically adds a
calendar attachment file (.ics file) which includes the date and time of
the event. However, this will only add the date/time for the last event
to their calendar since that is the event you are adding the tickets
under. For this reason, you may want to edit the confirmation email to
include all of the dates and times for the class.
To edit the email:
- Go to MembershipWorks > Event Calendar and click on the last event in the series
- Click the Advanced tab at the top
- Go to the box titled Confirmation Email
- Edit the message as needed, including details such as date and time for each day of the event
- Click Save
Final Step: Redirect all events to the last event date for registration
In
order to keep all of the registrations in the same location, you should
redirect all the events to the URL of the last event in the series.
Copy the URL
- Go to MembershipWorks > Event Calendar and click on the last event in the series
- Click the blue Embed/Link button under the event’s Dashboard tab
- Right click on the link under Direct link to event page and select Copy Link or Copy Link Address from the pop-up menu
If the link under Direct link to event page begins with event-url-not-setup, you should not copy that link. Instead, you can follow these steps to copy the URL:
- Go to the calendar on your website and click on the last event date in the series
- Select and copy the URL from the browser’s location bar (shown below)
Redirect the events
- Go to MembershipWorks > Event Calendar and click on the first event in the series
- Click Advanced tab at the top
- Under Redirect to external event page, paste the URL of the last event into the field
- Click Save
- Go to MembershipWorks > Event Calendar
and click on the next event in the series and repeat steps 2-4. Repeat
this for each event in the series (except for the last event date)
Get Support Along the Way


